
Downloads
Overview
This post is about a CI/CD process to deploy from one Salesforce sandbox to another using Gitlab. I do the local merge process with SourceTree. Here we don’t explain how to do the integration between Salesforce and Gitlab but it is a mandatory step before performing this post (for more information, go to this link).
We can validate and deploy the package with 2 Gitlab jobs shared in the GitHub link on the “Downloads” section.
Moreover, the merge strategy is quite basic and we don’t consider any merge conflict because we focus on a simple implementation.
Steps
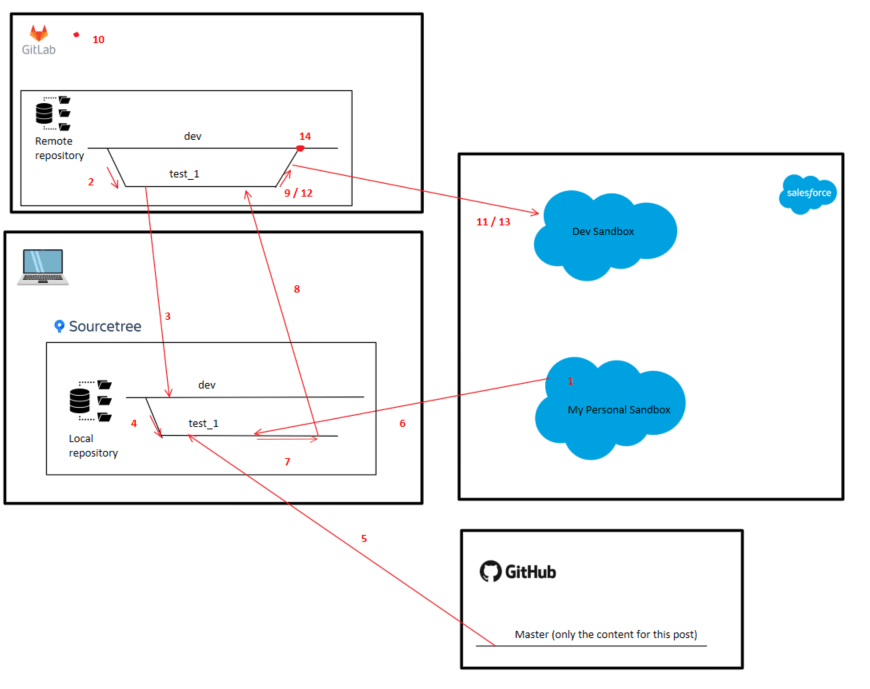
Step 1. Create a new feature in our personal sandbox
Step 2. Create the feature branch in Gitlab
Step 3. Pull Dev branch with SourceTree
Step 4. Checkout feature branch with SourceTree
Step 5. Add deployment folders to our local repo
Step 6. Retrieve the metadata from our personal sandbox with SFDX
Step 7. Commit the changes on the feature branch with SourceTree
Step 8. Push the changes from feature branch with SourceTree
Step 9. Create a merge request with Gitlab
Step 10. Set up deployment variables in Gitlab
Step 11. Validate deployment with Gitlab
Step 12. Approve merge request in Gitlab
Step 13. Deploy changes with Gitlab
Step 14. Merge changes with Gitlab
Resources
Step 1. Create a new feature in our personal sandbox
Create some changes which we will deploy later in other sandbox e.g. a new apex class.
Open your personal dev sandbox -> Open Developer Console -> File -> New -> Apex class -> Create a class called “ApexClassExample” -> copy and paste the code
public class ApexClassExample
{
    public static String getLetterA()
    {
        return 'A';
    }
}
Step 2. Create the feature branch in Gitlab
Open Gitlab -> Select our repository -> Repository -> Branches.

Click on “New branch”.

We fill the following fields:
- Branch name: our branch name e.g. test_1.
- Created from: select the branch related to our sandbox. We consider that “dev” branch is the source of truth of our dev sandbox which we will deploy.
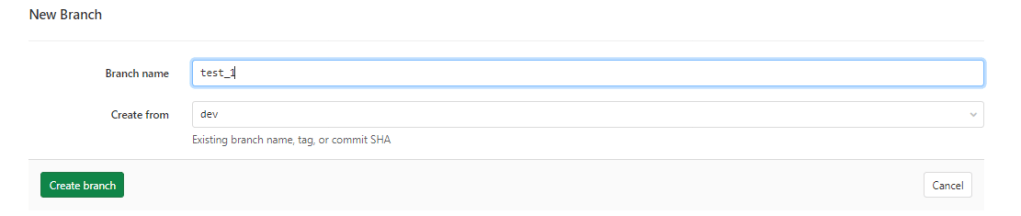
Click on “Create branch”.

Step 3. Pull Dev branch with SourceTree
Go to SourceTree -> Open our repo folder -> on the BRANCHES area, click twice on “dev”.

Click on “Pull” and accept the settings.

Step 4. Checkout feature branch with Bitbucket
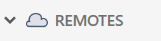
On Bitbucket -> on the REMOTES section, click twice on the “test_1” branch

Now “test_1” branch should appear on the BRANCHES section.

Step 5. Add deployment folders to our local repo
Go to the top of the post -> “Download” section -> get the files from GitHub -> add them in the folder where we have our repo -> we have the following folders:
- assets: add your “server.key.enc” which was generated in the Trailhead commented on the “Overwiew” section.
- force-app: to include all the metadata to deploy. In this case, the Apex class.
- manifest: this includes other folder called “test” which inside it is the package.xml to deploy.
- .gitlab-ci.yml: file to deploy with Gitlab.
- sfdx-project.json
Step 6. Retrieve the metadata from our personal sandbox with SFDX
Open the folder where we have the repo and write this command:
sfdx force:source:retrieve -m ApexClass:ApexClassExample -u OUR_SANDBOXStep 7. Commit the changes on the feature branch with SourceTree
Open SourceTree and click on “Commit”.

Move changes from “Unstaged files” area to “Staged files”. Click on “Stage All”.
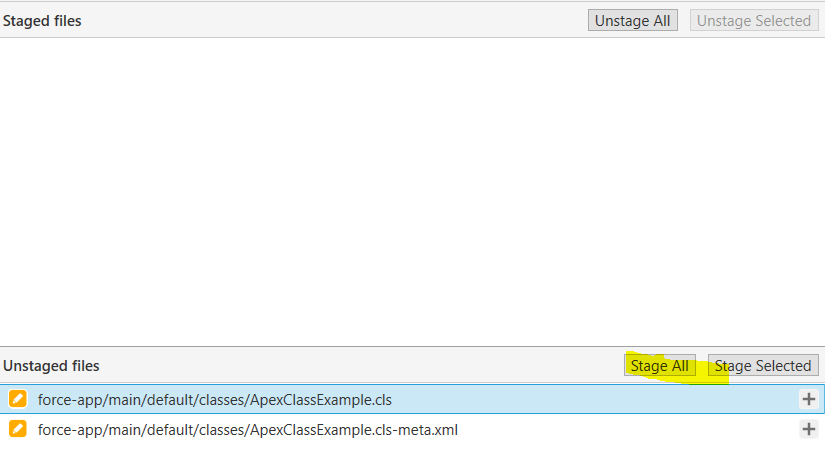
Now the changes are on the “Stage files” area.
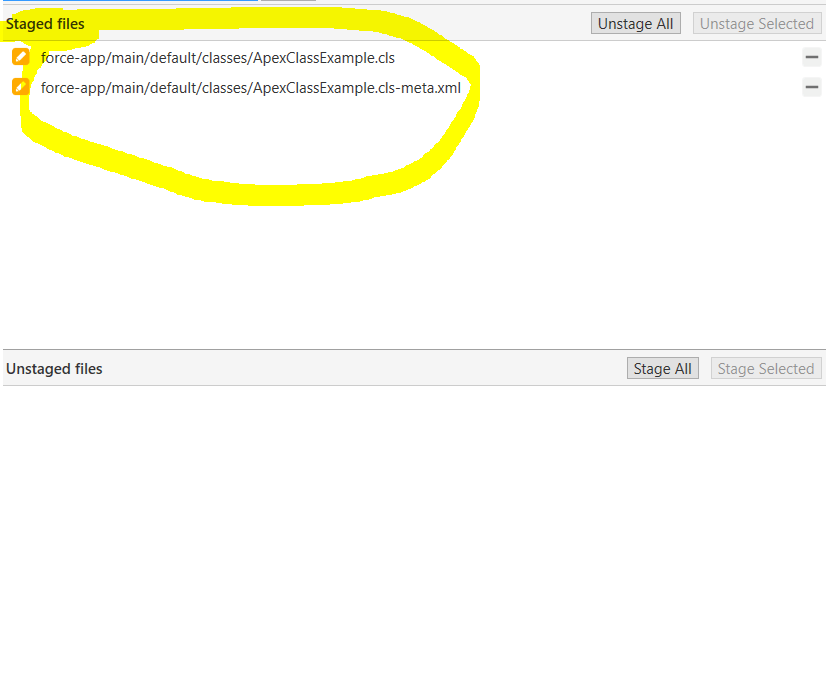
Write a comment e.g. “test commit” and click on “Commit”.

Step 8. Push the changes from feature branch with SourceTree
Open SourceTree -> click on “Push”.

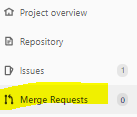
Step 9. Create a merge request with Gitlab
Open Gitlab -> our repository -> select “Merge Request”.
Click on “New merge request”.

Select the “Source branch” field as “test_1” and “Target branch” field as “dev”.

Click on “Compare branches and continue”.

We should fill the title and the description.
NOTE: I suggest to add a reviewer (a dev or devops) to check the changes in the merge request before merging. We can assign the reviewer on the “Assignee” field.

Step 10. Set up deployment variables in Gitlab
In Gitlab, go to “Settings” -> CI / CD.

Go to “Variables” section, add the following variables:
- PACKAGEXML_FOLDER: set the value “test”.
- SERVER_KEY_PASSWORD: set the value for the license which you set up in the Trailhead commented on the “Overview” section.
- SF_CONSUMER_KEY_TEST_SANDBOX: in the connected app created in Saleforce in the Trailhead, gets the “Customer Key” value.
e.g. for PACKAGEXML_FOLDER would be:

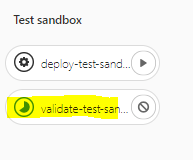
Step 11. Validate deployment with Gitlab
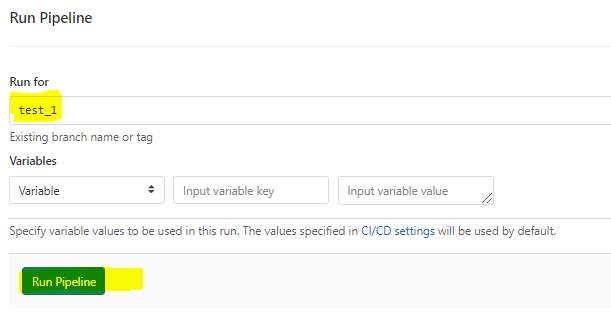
In Gitlab, go to CI/CD -> Pipelines.

Click on “Run Pipeline”.

Select our “test_1” branch and click on “Run Pipeline”.
Click on the play icon on the validate-test-sandbox job

Click on the job to see the debug.
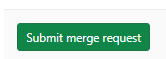
Step 12. Approve merge request in Gitlab
In order to grant quality in our code, other developer should review the merge request and add some comments. In case there are any comment which we want to apply, we should add the changes in other commit and wait for the approval. We will decide if we have to validate the package again.
In the merge request, there is a button to approve.

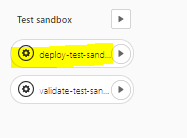
Step 13. Deploy changes with Gitlab
Once the merge request is approved, we can deploy our changes. We can deploy without validation following “Step 11. Validate deployment” but selecting deploy-test-sandbox rather than validate-test-sandbox.
Step 14. Merge changes with Gitlab
Once it is deployed in the sandbox, we should merge the merge request.

Resources
