Overview
This post is about how to assign a Service Appointment to a Service Crew and log in as a Service Crew.
Steps
Step 1. Create Operationing Hours
Step 2. Create Service Territory
Step 3. Create Users
Step 4. Create Service Crew
Step 5. Create Service Resources and create Service Territory Members to Technicians
Step 6. Create Service Crew Members
Step 7. Assign Service Territory to the Service Resource related to Service Crew and activate it
Step 8. Create Service Appointment
Step 9. Assign Service Appointment to the Service Crew
References
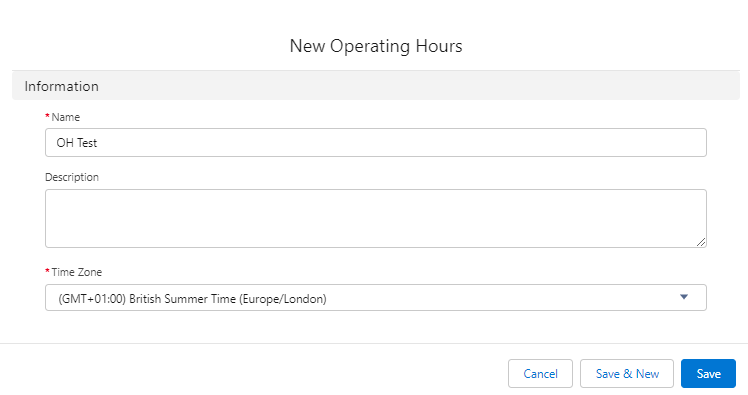
Step 1. Create Operationing Hours
Operating Hours -> New -> Fill the fields as the screenshot and save.
Step 2. Create Service Territory
Service Territory -> New -> Fill the fields as the screenshot and save.

Step 3. Create Users
We will create one user per technician. They will be called: Technician User 1 and Technician User 2.
Technician User 1: Setup -> Users -> Fill the fields as the screenshot and save ->Enable the user when you receive the email.
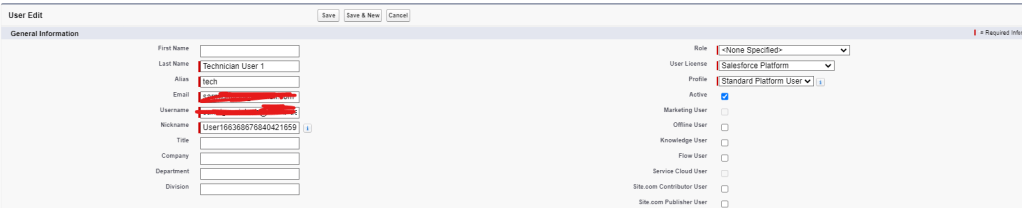
Technician User 2: Setup -> Users -> Fill the fields as the screenshot and save ->Enable the user when you receive the email.

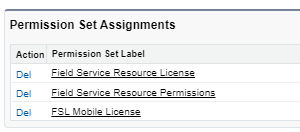
Assign these permission sets to both users NOTE: FSL Mobile License is only necessary if you use FSL Mobile App.
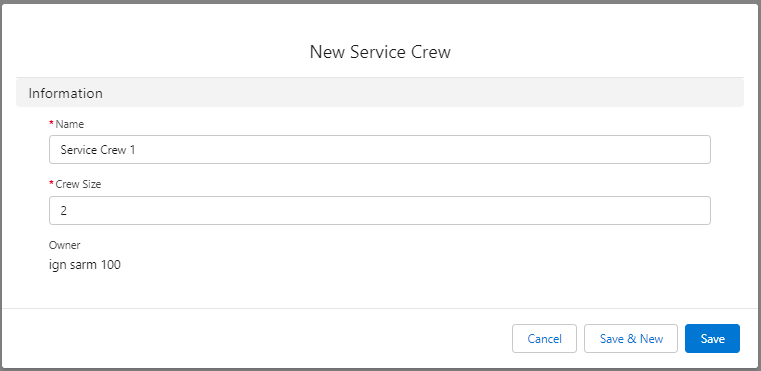
Step 4. Create Service Crew
Service Crew -> New -> Fill the fields as the screenshot and save.
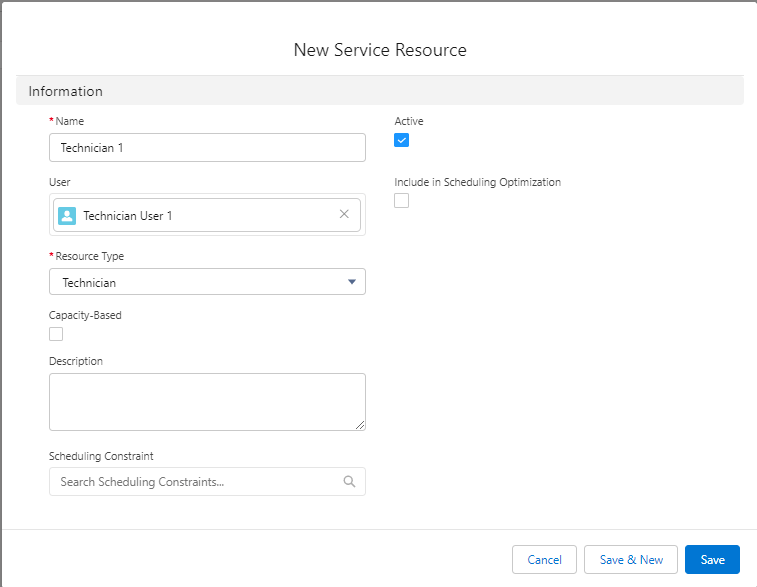
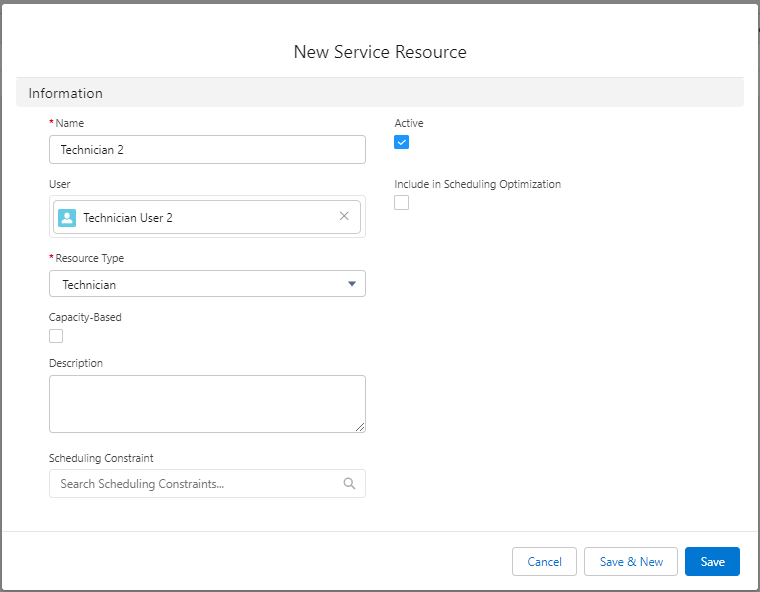
Step 5. Create Service Resources and create Service Territory Members to Technicians
We will create 3 Service Resources: Technician 1, Technician 2 and Service Resource (Crew). The last one is needed to create the Service Crew. Morever, we have to assign previous created user for “Technician 1” and “Technician 2”.
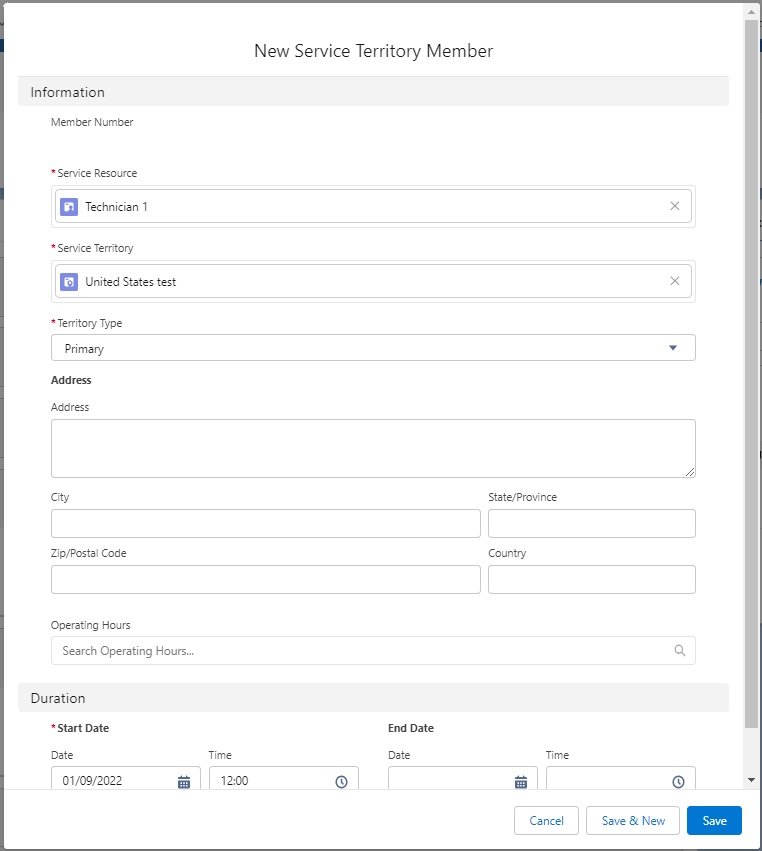
Technician 1: Service Resource -> New -> Fill the fields as the screenshot and save.
In this new record, click on ‘New’ in the ‘Service Territories’ related list -> Fill the fields as the screenshot and save
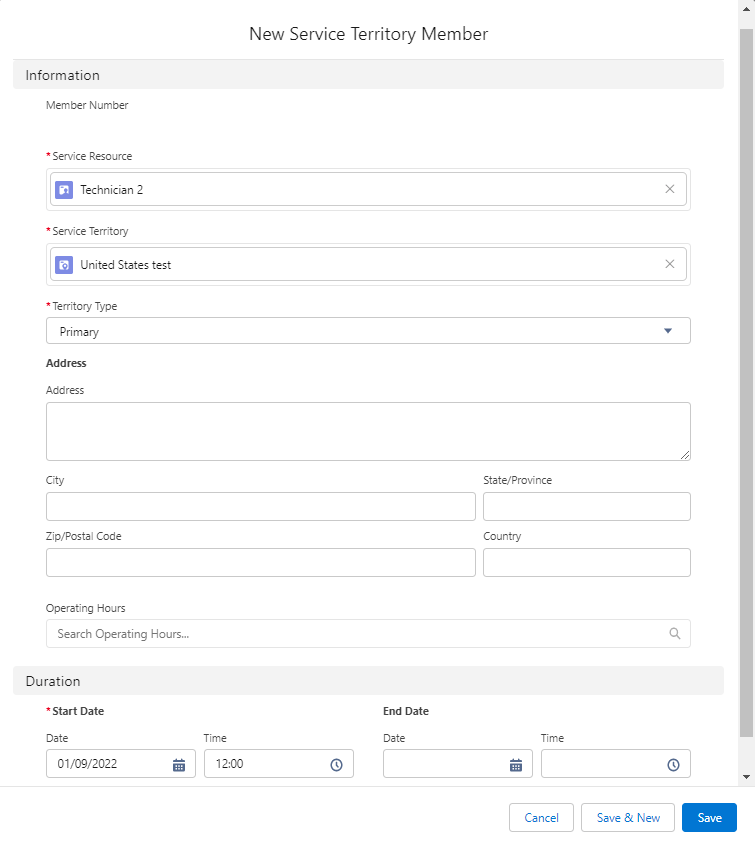
Technician 2: Service Resource -> New -> Fill the fields as the screenshot and save
In this new record, click on ‘New’ in the ‘Service Territories’ related list -> Fill the fields as the screenshot and save.
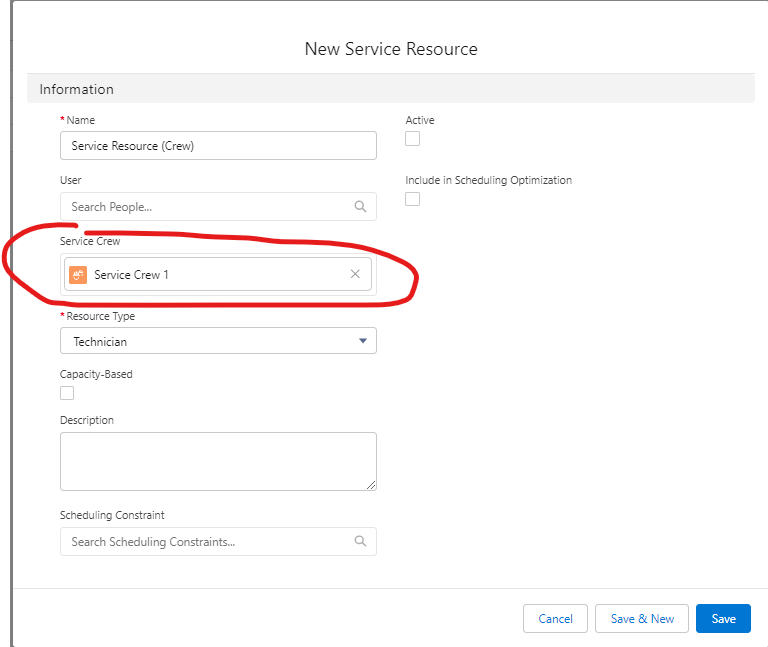
Service Resource (Crew):
Before creating this Service Resouce, we have to add “Service Crew” field in the Service Resource page layout.
Service Resource -> New -> Fill the fields as the screenshot and save (NOTE: we will active it and create its Service Territory Member later).
Step 6. Create Service Crew Members
We will assign both Technicians to the Service Crew.
Service Crew Member 1: Service Crew -> ‘Service Crew 1’ record -> on the ‘Service Crew Members’ related list, click on ‘New’ button -> Fill the fields as the screenshot and save.
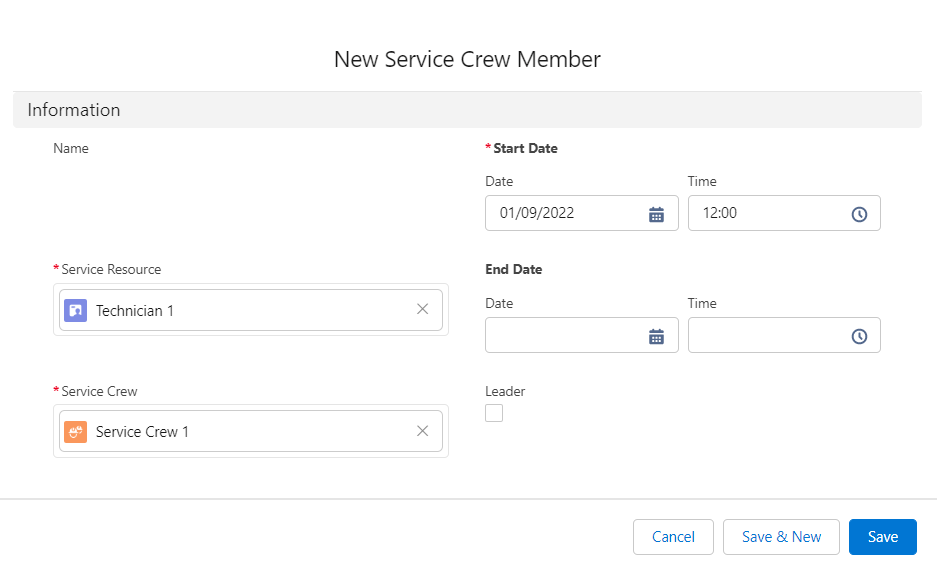
Service Crew Member 2: Service Crew -> ‘Service Crew 1’ record -> on the ‘Service Crew Members’ related list, click on ‘New’ button -> Fill the fields as the screenshot and save.

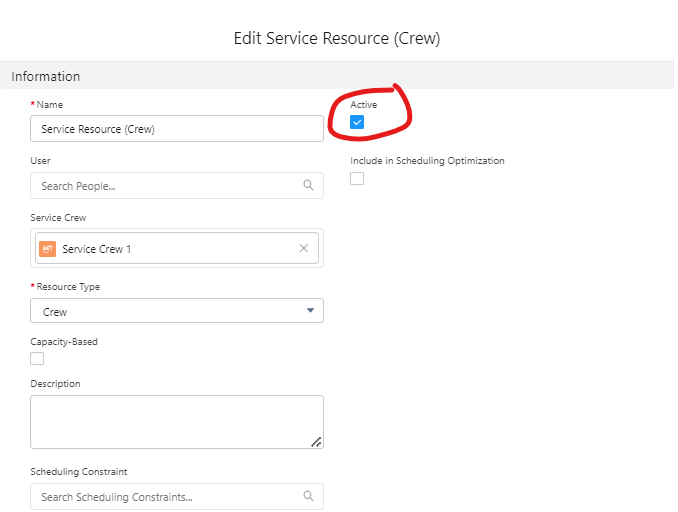
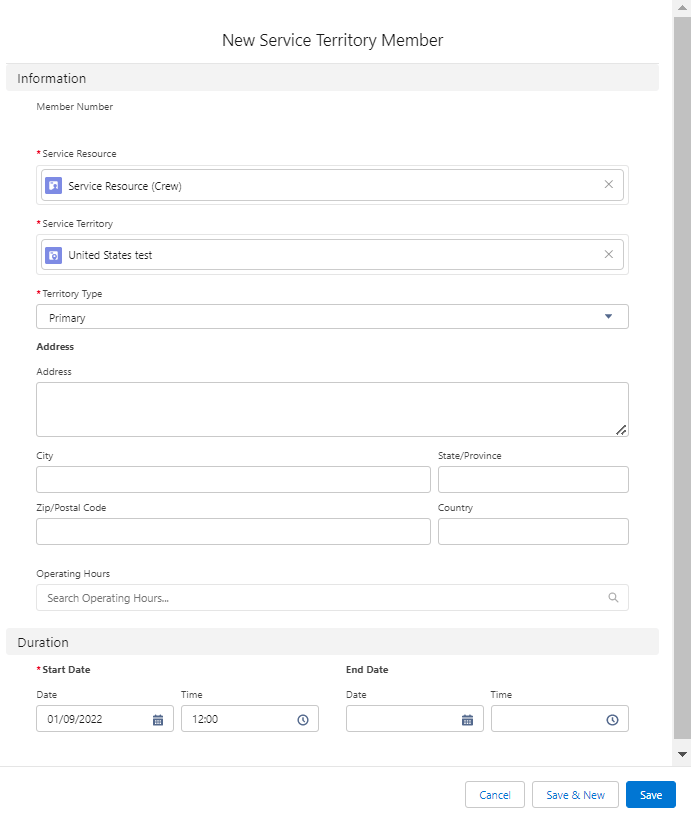
Step 7. Assign Service Territory to the Service Resource related to Service Crew and activate it
Service Resource -> ‘Service Resource (Crew)’ record -> ‘Edit’ button -> Activate the record
On this record, click on ‘New’ in the ‘Service Territories’ related list -> Fill the fields as the screenshot and save.
Step 8. Create Service Appointment
Service Appointment -> New -> Fill the fields as the screenshot and save

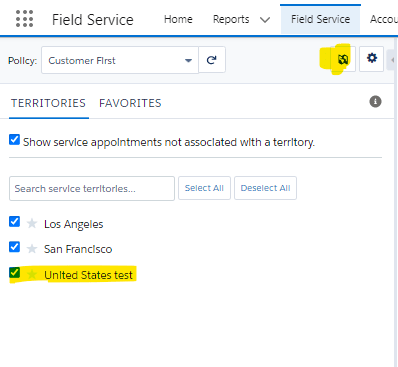
Step 9. Assign Service Appointment to the Service Crew
Field Service -> click on the ‘Filter Territory’ icon -> select the created Service Territory -> Save
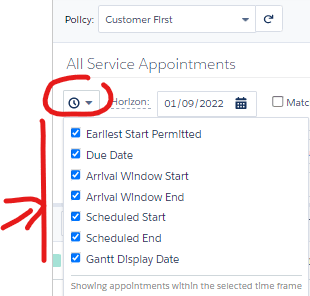
Click on the ‘clock’ icon -> enable all the times (NOTE: make sure time range is correct to render your Service Appointment)
Drag the Service Appointment from the Service Appointment List (left hand side) to the Gantt chart to “Service Resource (Crew)”
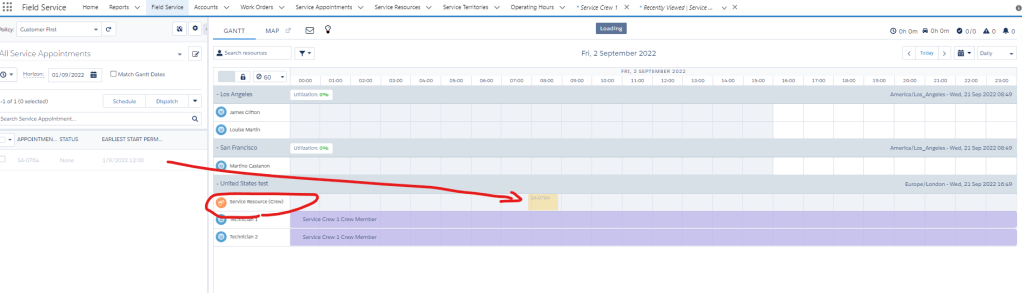
Service Appointment -> your Service Appointment record -> if you check the ‘Assigned Resource’ related list, then you can see that the Service Appointment was assigned to the 3 Service Resources.

References
