
Overview
This post is about how to integrate Tableau with a Salesforce Lightning Community using Single Sign on.
Steps
Step 1. Create a Salesforce Community
Step 2. Create a domain
Step 3. Create Admin User in Tableau
Step 4. Download Tableau Identity Provider
Step 5. Create a certificate in Salesforce
Step 6. Create Identity Provider in Salesforce
Step 7. Create Connected App
Step 8. Upload Salesforce Community Identity Provider file in Tableau
Step 9. Create a Customer Community user in Salesforce
Step 10. Create a Customer Community user in Tableau
Resources
Step 1. Create a Salesforce Community
Open Salesforce Lightning -> Setup -> All Communities.

Click on ‘New Community’ button.

Select any templates, e.g. Build Your Own.

Click on ‘Get Started button’ -> Call the community ‘Tableau Integration’ and the url ‘tableauintegration’ -> Click on ‘Create’ button.

Wait until the community is built.

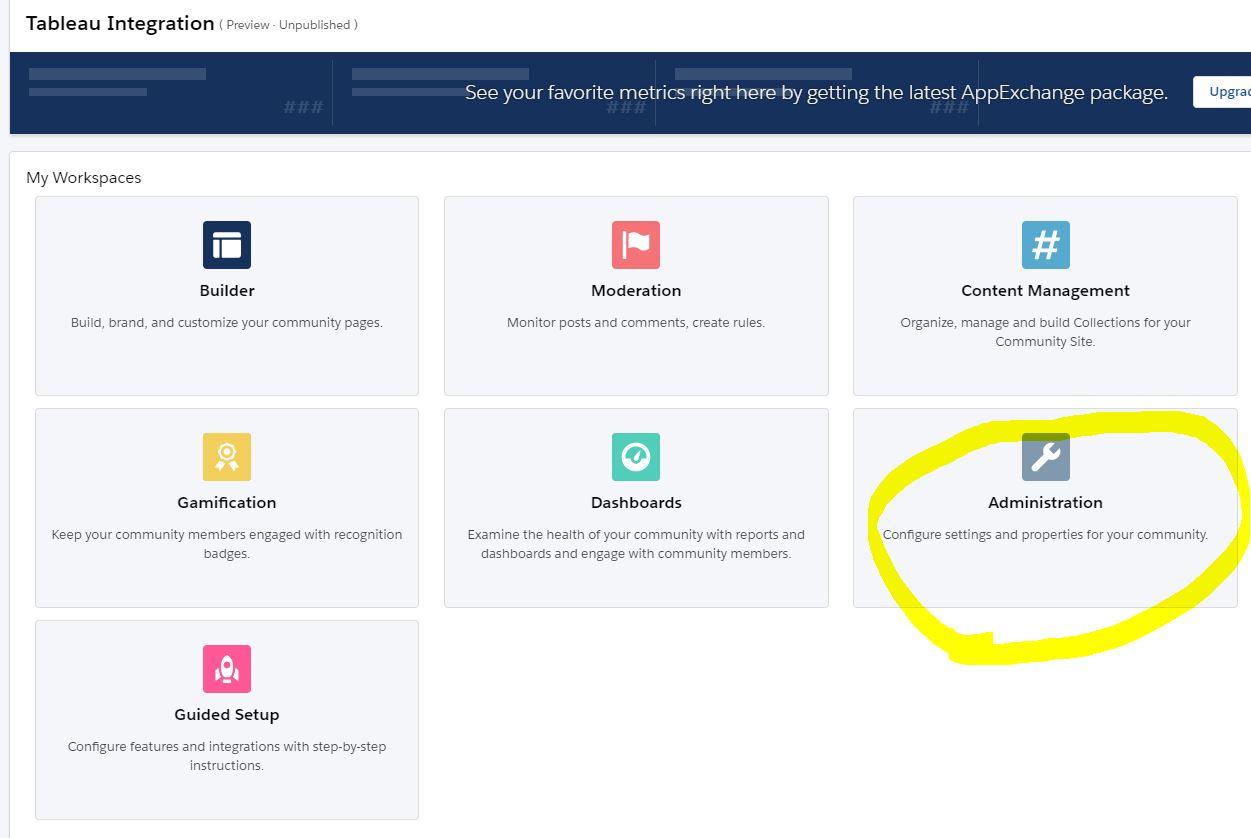
Click on ‘Administration’.
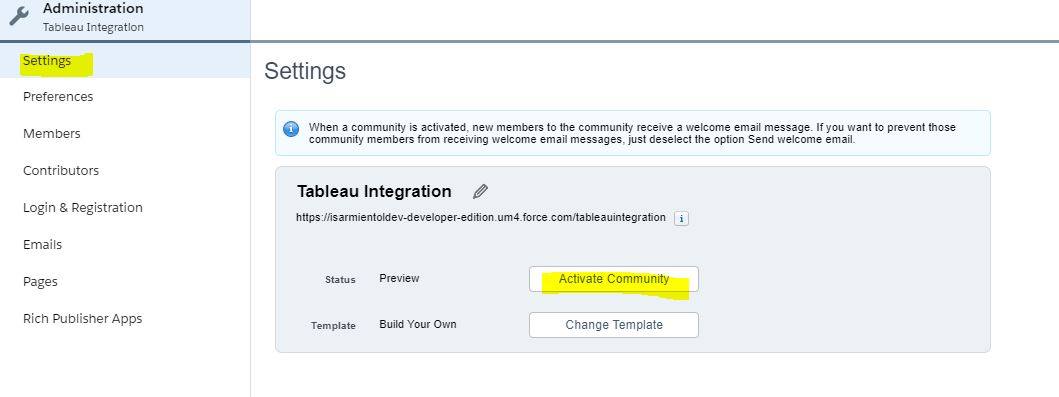
Activate community: go to ‘Settings’ -> click on ‘Activate Community’.
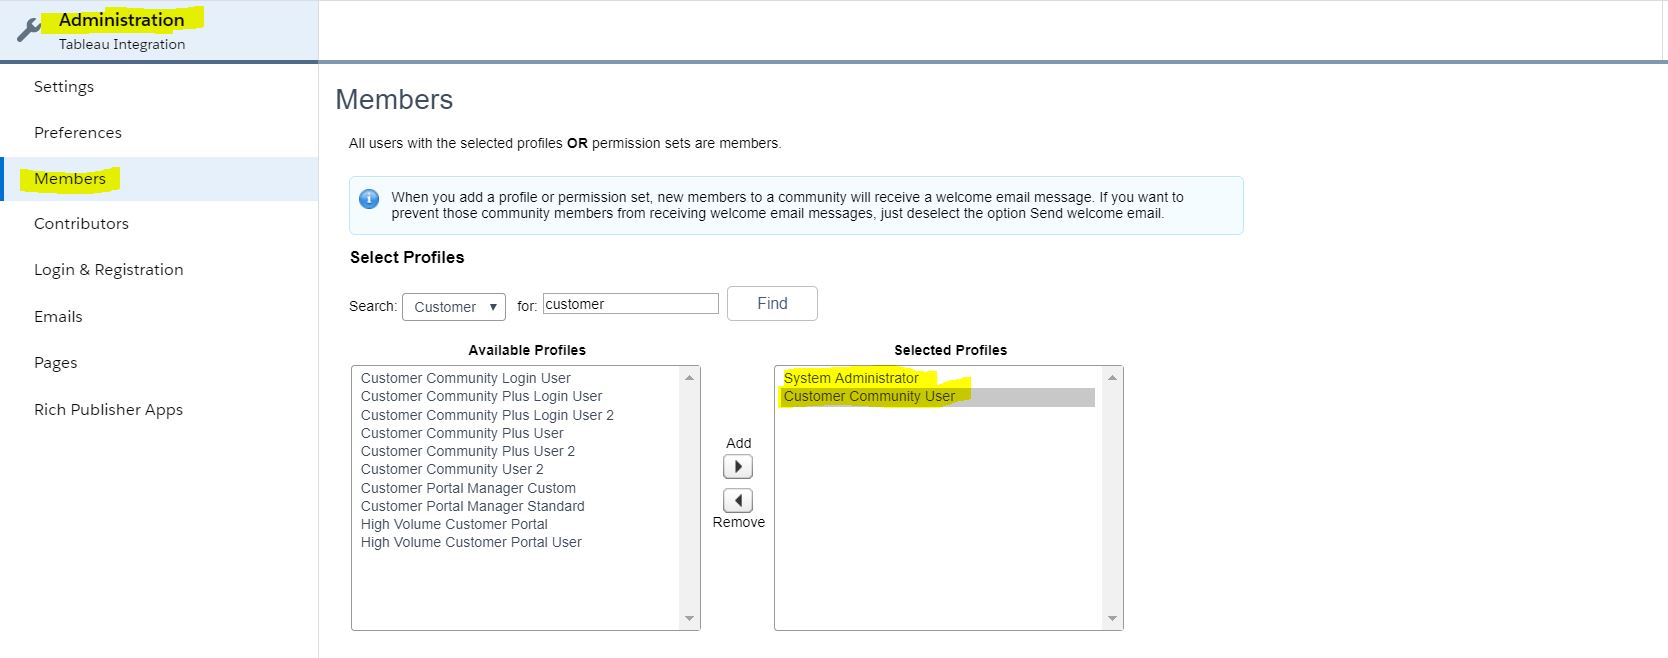
Add profiles that will have access to the Community e.g. ‘System Administrator’ (for our Admin internal users) and ‘Customer Community User’ (for External users). In the community settings, go to ‘Administration’ -> ‘Members’ -> Add previous profiles -> click on ‘Save’ button.
Step 2. Create a domain
Setup -> My Domain -> Follow the steps to create a domain.
Step 3. Create Admin User in Tableau
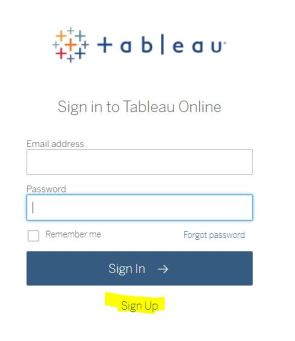
Open Tableau website (go to http://www.online.tableau.com/)-> click on ‘Sign up’ -> follow the steps.
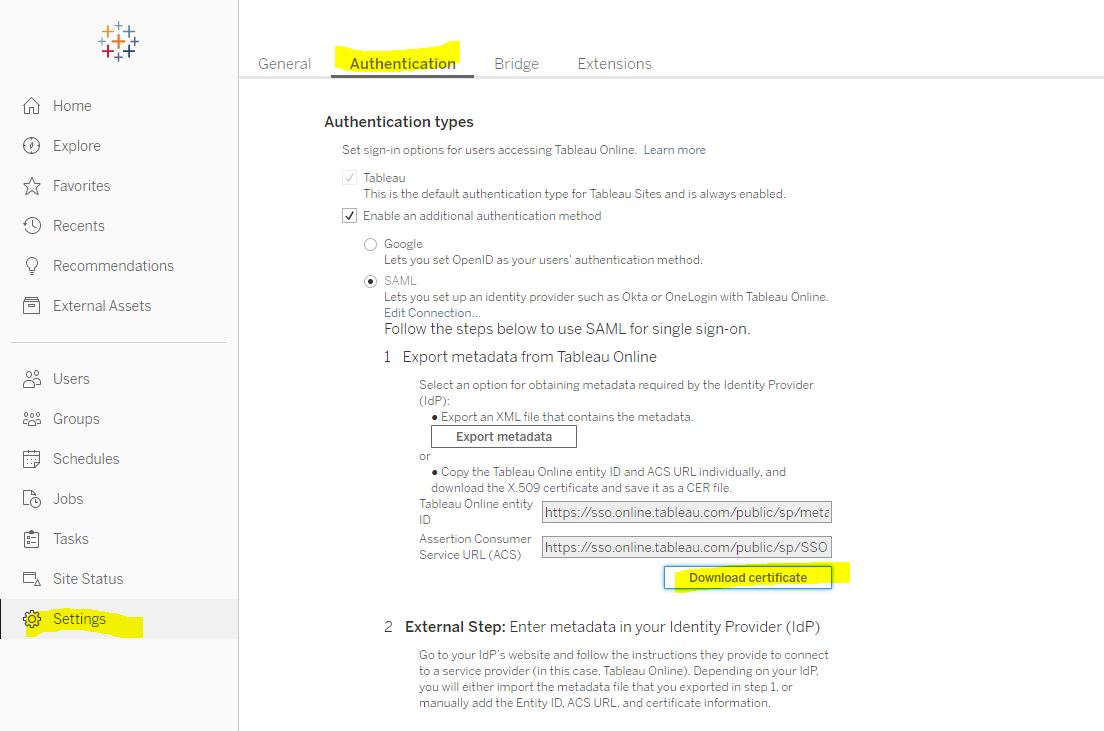
Step 4. Download Tableau Identity Provider
Log in Tableau -> Settings -> ‘Authentication’ tab -> Download Tableau IdP -> Select ‘SAML’ -> click on ‘Download certificate’ button.
Step 5. Create a certificate in Salesforce
Go to Salesforce -> Setup -> Certificate and Key Management -> click on ‘Create Self-Signed Certificate’.

Fill the following fields and click on ‘Save’.
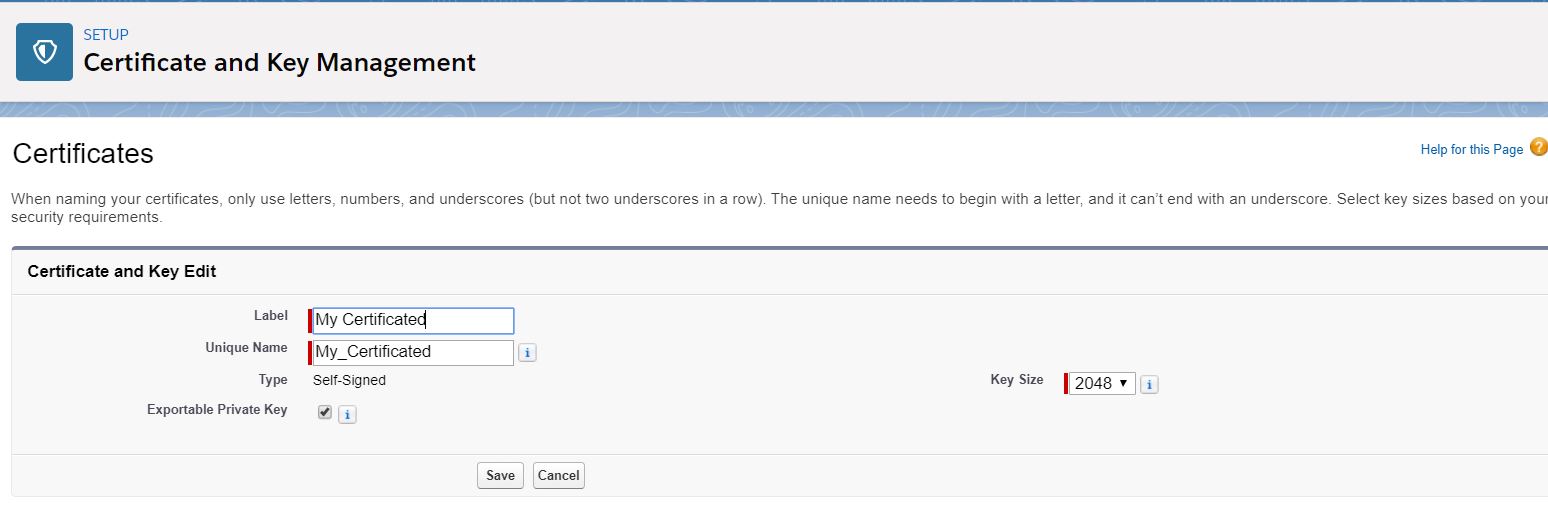
The certificate should have been created.

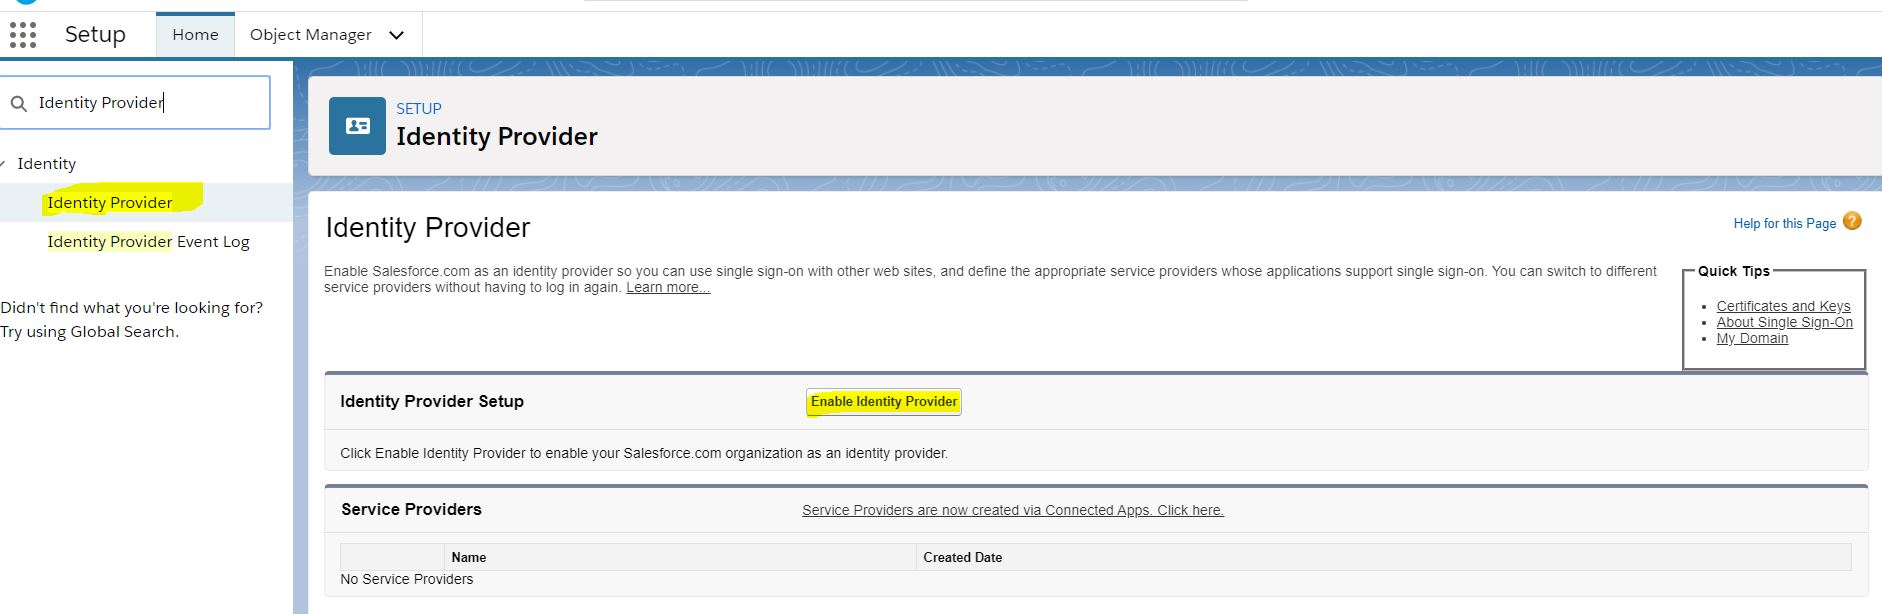
Step 6. Create Identity Provider in Salesforce
Go to Salesforce -> Setup -> Identity Provider -> click on ‘Enable Identity Provider’.
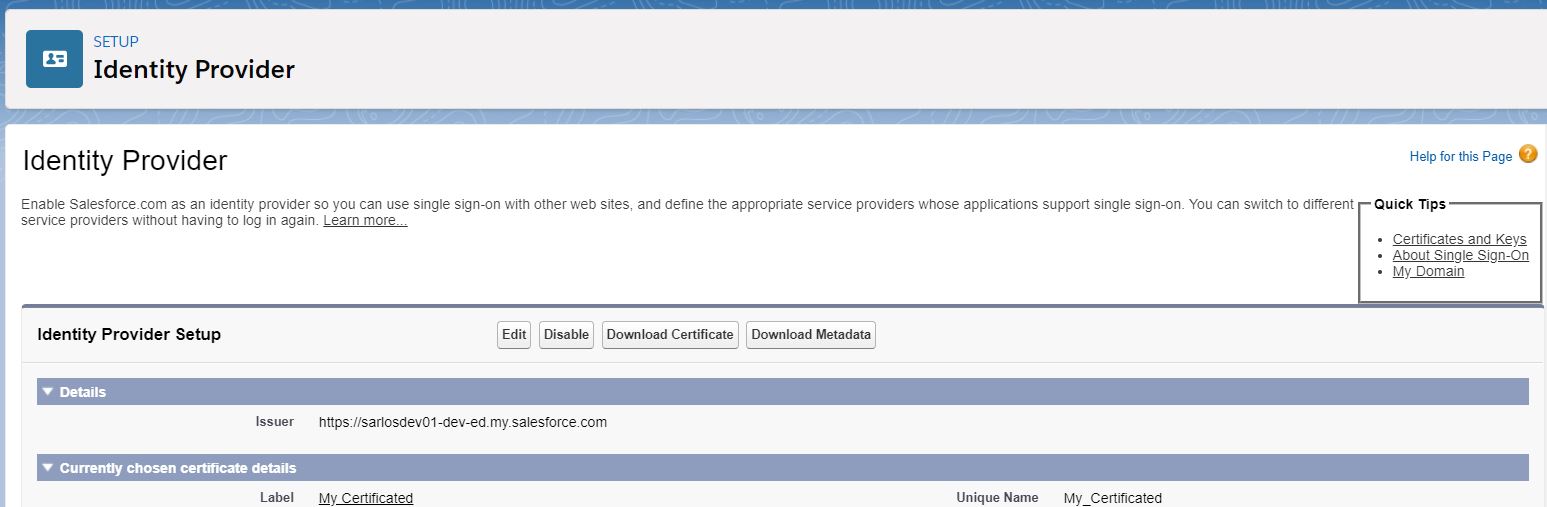
Select our created certificate and click on ‘Save’.

The Identity Provider should have been created.
Step 7. Create Connected App
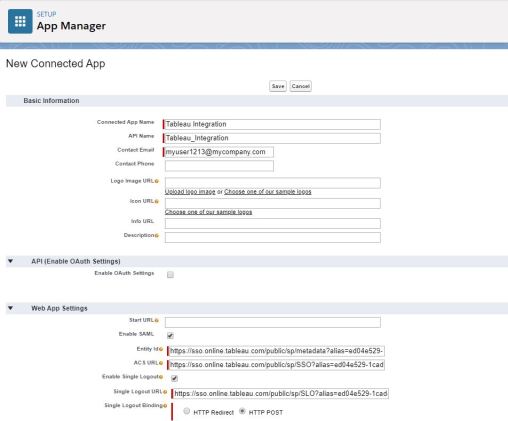
Go to Salesforce -> Setup -> App Manager -> click on ‘New Connected App’.

Keep this creation page open because we need some values from Tableau website. Open Tableau website -> Settings -> Authentication -> Copy the these highlighted values in the screenshot (“Tableau Online entity ID” and “Assertion Consumer Service URL (ACS)”.

Come back to Salesforce to the Connected App creation page and fill the following fields:
- Entity Id: ‘Tableau Online entity’ field that we copied before from Tableau website.
- ACS URL: ‘Assertion Consumer Service URL (ACS)’ field that we copied before from Tableau website.
- Single Logout URL: ‘Assertion Consumer Service URL (ACS)’ but updating the ‘SSO’ url part for ‘SLO’.
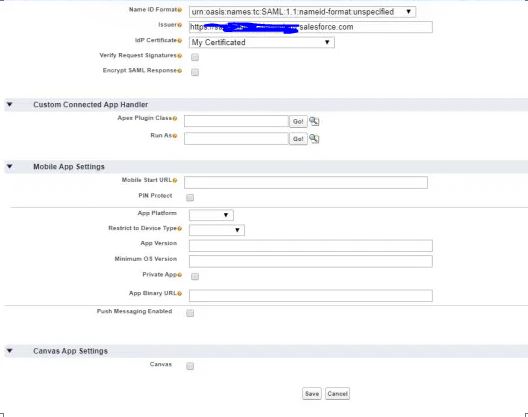
- IdP Certificate: the certificate created on the ‘Step 5. Create a certificate in Salesforce’ step.
- Verify Request Signatures: upload the file form downloaded from the ‘Step 4. Download Tableau Identity Provider’ step.
Add profiles we added as Members in the ‘Step 1. Create a Salesforce Community’ step. Go to the created connected app -> in the ‘Profiles’ related list -> click on ‘Manage’ profiles button -> Add the those profiles.

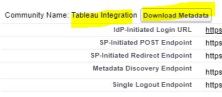
On the created connected app, click on ‘Download Metadata’ in the ‘Tableau Integration’ Community name.
Step 8. Upload Salesforce Community Identity Provider file in Tableau
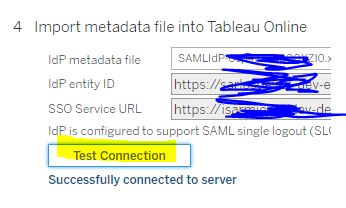
Go to Tableau -> Settings -> Authentication -> on the ‘Import metadata file into Tableau Online’, opposite ‘IdP metadata file’ field, click on ‘Browse…’ button.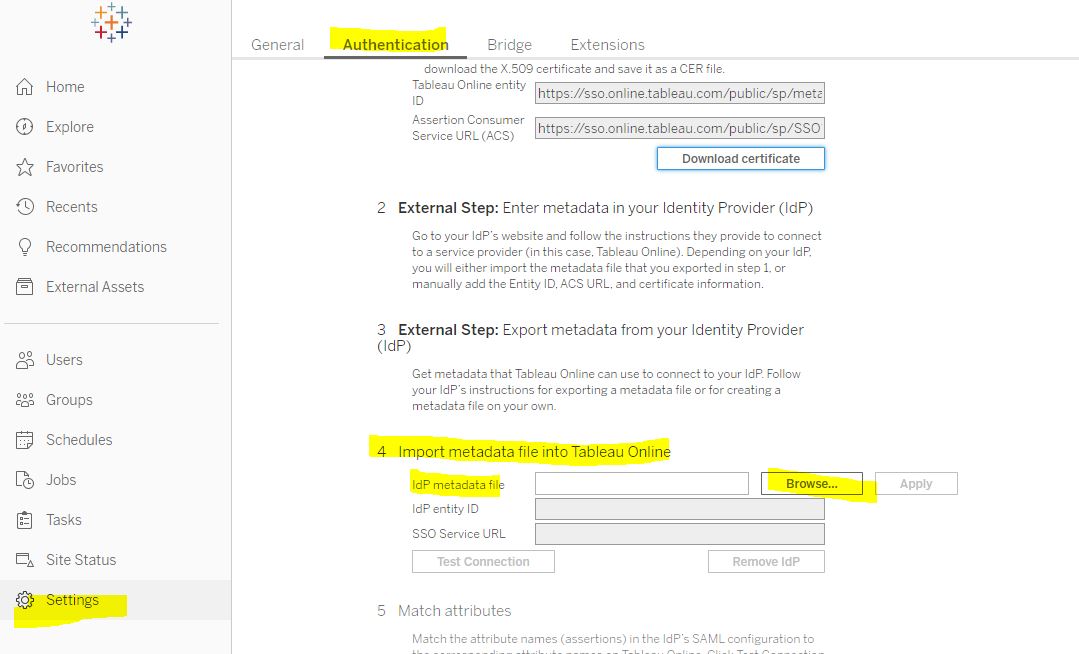
Click on ‘Apply’ button.

Click on ‘Test Connection’.
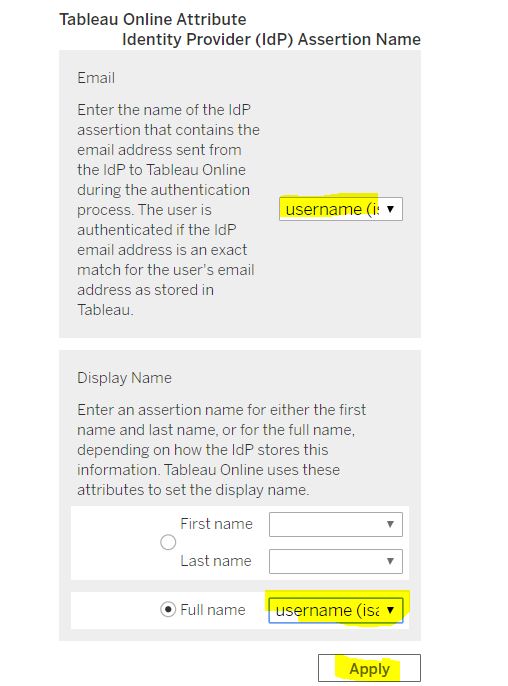
Select ‘username’ for both fields and click on ‘Apply’ button.
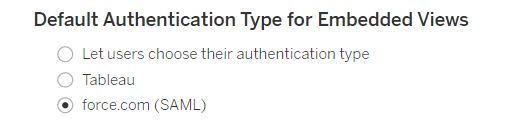
On the ‘Default Authentication Type for Embedded Views’ section, select ‘force.com (SAML)’.
Step 9. Create a Customer Community user in Salesforce
Create community user with the community profile that we added as Member the ‘Step 1. Create a Salesforce Community’ step.
See the ‘Customer Community User’ section in my post Create and Manage Community Users.
NOTE: create the user with the same email and username to avoid logging errors.
Once we have created the user, we will receive a confirmation email from. Follow the steps and log in.
Step 10. Create a Customer Community user in Tableau
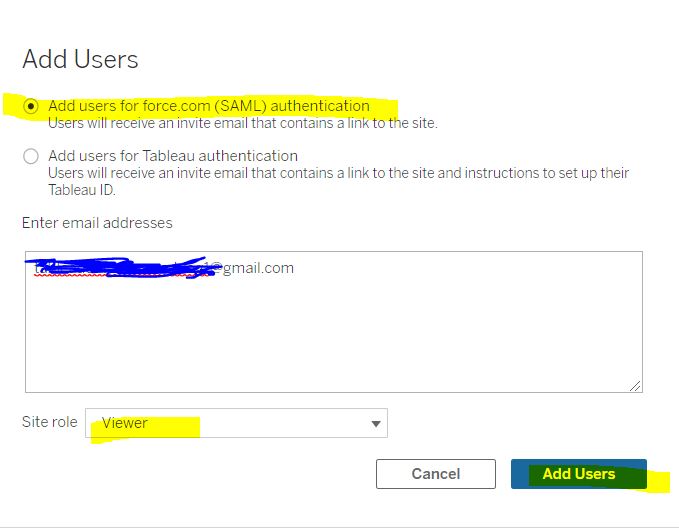
Open Tableau website, go to http://www.online.tableau.com/ -> Log in with the Admin user, not the one we created in last step -> Users -> click on ‘Add User’ button.
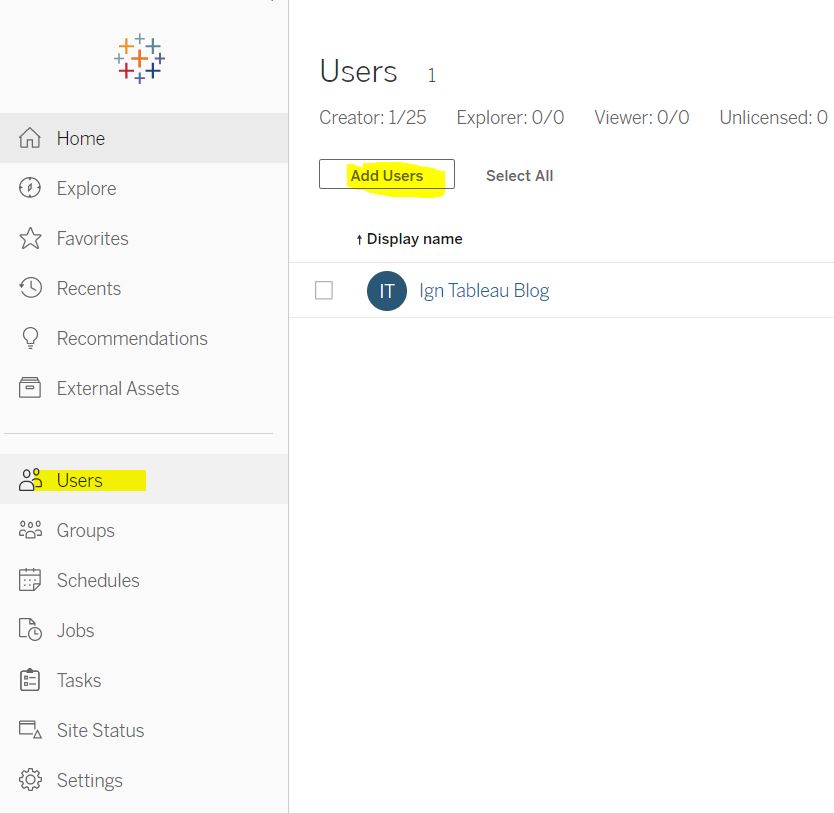
Add the email related to the created Customer User, fill the following fields and click on ‘Add Users’ button.
The user should have received an email. Click on ‘Sign in’ button in the email.
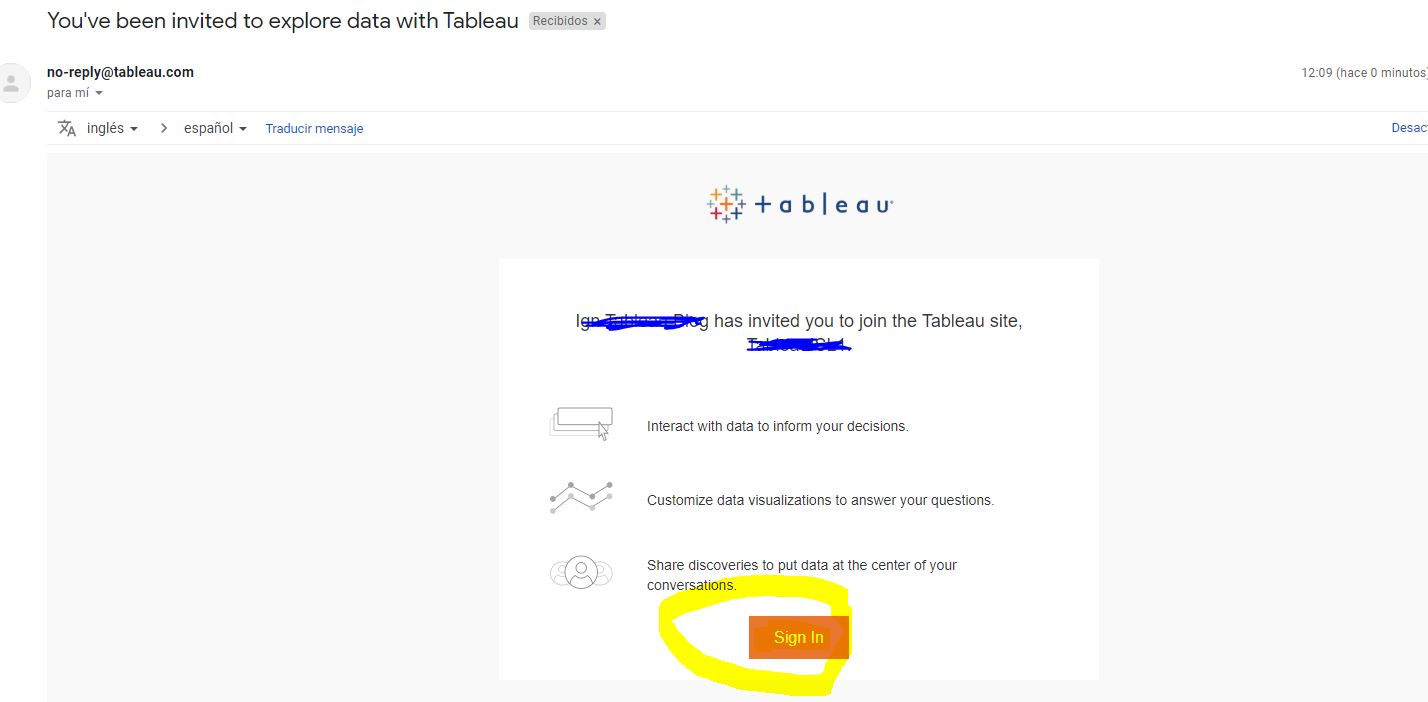
When we try to log in with Customer User, we cannot enter the password because we set up SAML with Salesforce. Click on ‘Sign In’ button.

Enter the Customer User credentials in the new page and click on ‘Log in’.

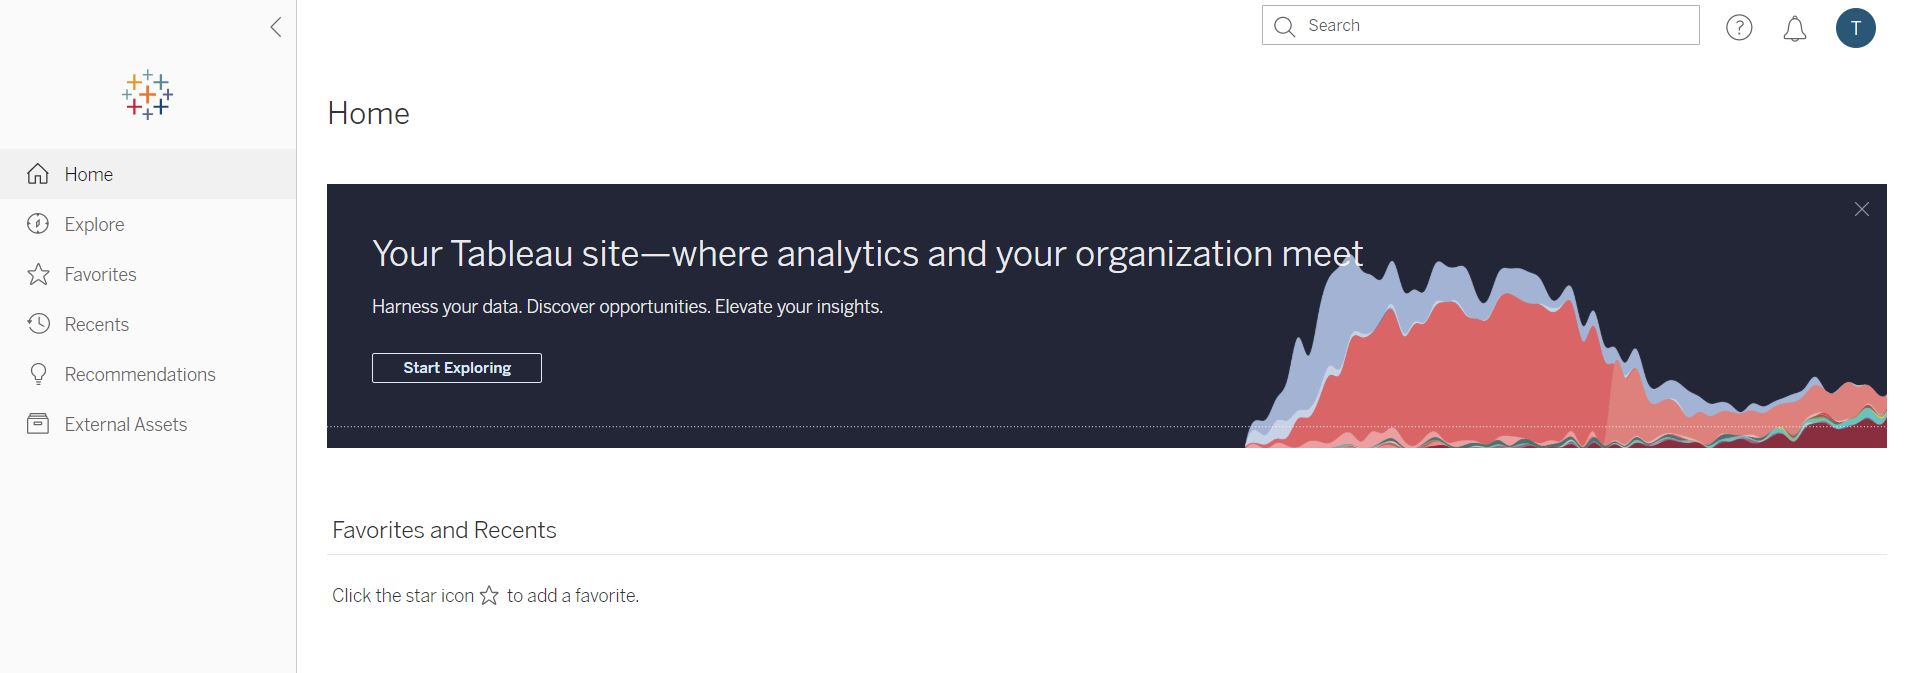
We should be redirected to Tableau.
Resources
Add a Domain
https://help.salesforce.com/articleView?id=domain_mgmt_add.htm&type=5
Salesforce Community Overview
https://help.salesforce.com/articleView?id=networks_resources.htm&type=5
Tableau documentation
