
Overview
This post is about how to create a Salesforce project with IntelliJ IDEA, Illuminated Cloud and GitHub. We will create a repository in GitHub, we will retrieve the metadata from Salesforce to our local machine with Illuminated Cloud and will push our changes to GitHub repository. All the steps we will do with Illuminated Cloud.
Steps
Step 1. Clone the git repository in your computer
Step 2. Create a new branch
Step 3. Retrieve metadata from your sandbox
Step 4. Commit and push to your repository
Step 1. Clone the git repository in your computer
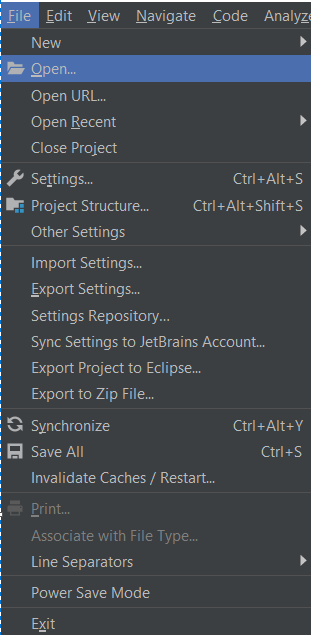
Open IntelliJ IDEA -> ‘File’ -> ‘Open’
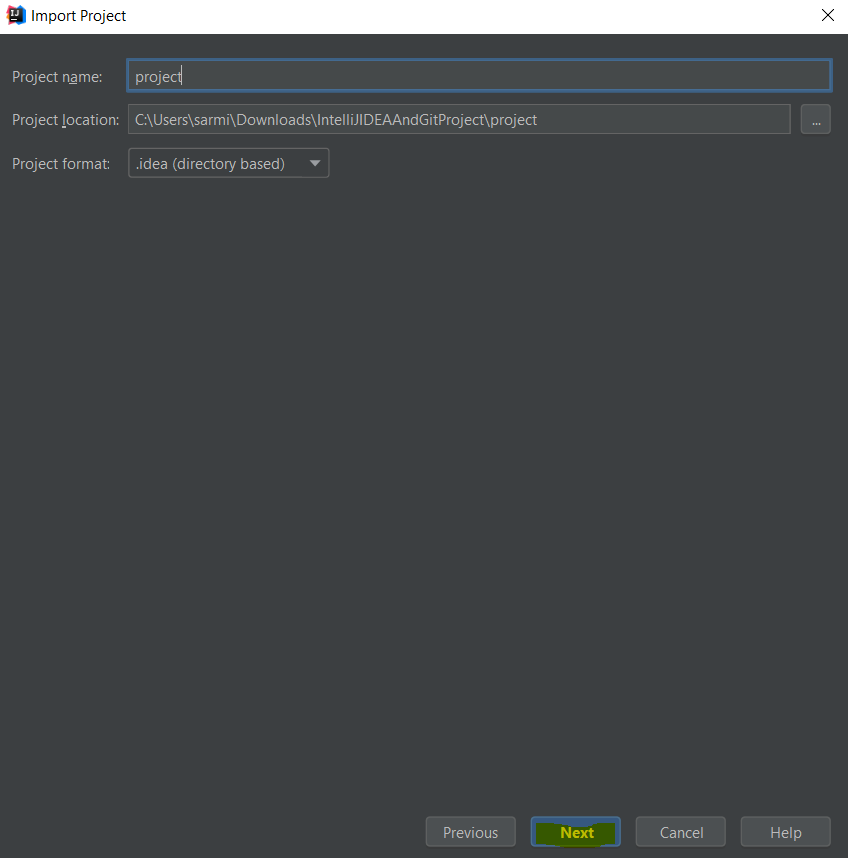
Create a empty folder which we store the project. For example: ‘IntelliJIDEAAndGitProject’

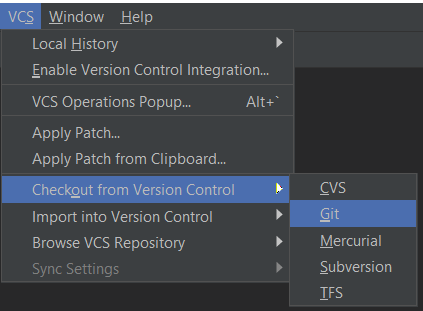
Open Git settings in InteliJ IDEA. Select ‘VCS’ -> ‘Checkout from Version Control’ -> ‘Git’.
In this popup, we have to copy our repo url.

Get your repo url. Go to your GitHub repo -> click on ‘Clone or Download’ button -> Copy the URL. In this example, I will copy from my Salesforce blog repo.

Paste the URL in the previous popup.

Click on ‘Test’ button and review the message ‘Connection successful’.

Create a folder inside the folder we create before, because git repo must be in a empty folder and IntelliJ IDEA generate the .idea folder by default. For example, call the folder ‘project’.
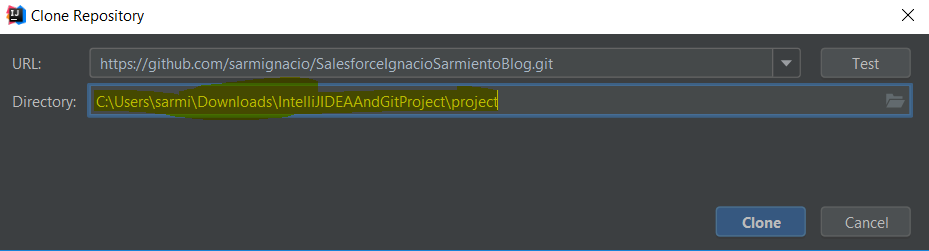
Click on ‘Clone’ button.

Click on ‘Yes’.

Click on ‘Next’
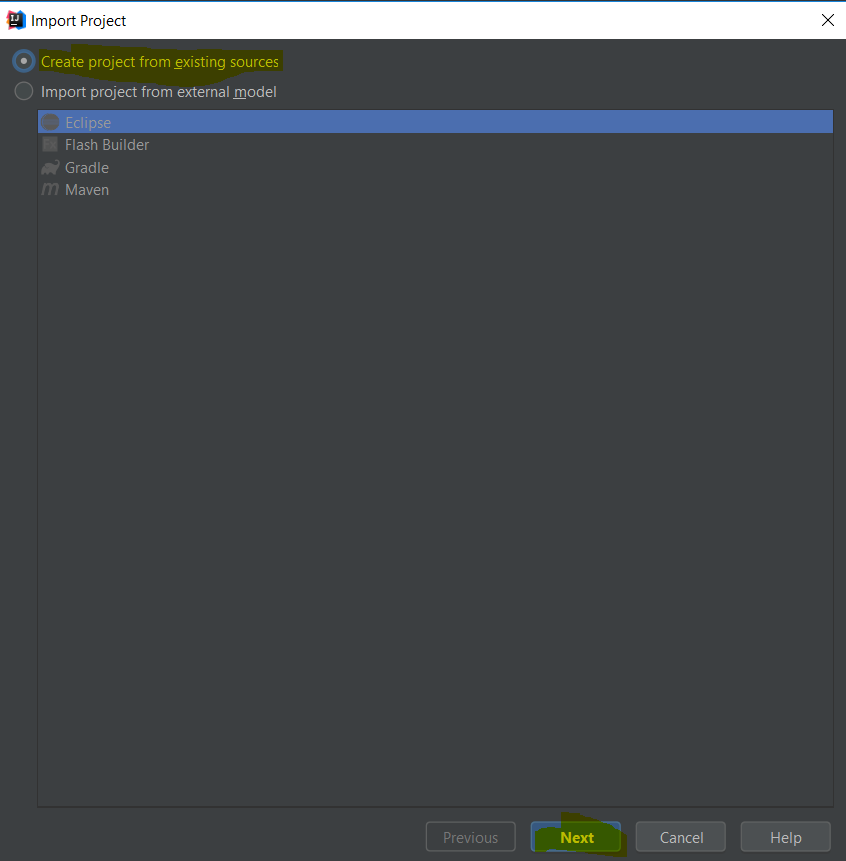
Click on ‘Next’.
Click on ‘Next’

Click on ‘Finish’.

Step 2. Create a new branch
Create a new branch. On the bottom right, select ‘Git:<your current branch> -> ‘+ New Branch’.

Name it as ‘my-first-project-test’ and click on ‘OK’.

Step 3. Retrieve metadata from your sandbox
Check the event logs (on the bottom right). Check there is a message related to Illuminated Cloud. Click on ‘Resolve’.

Click on ‘OK’.

Click on ‘+’.
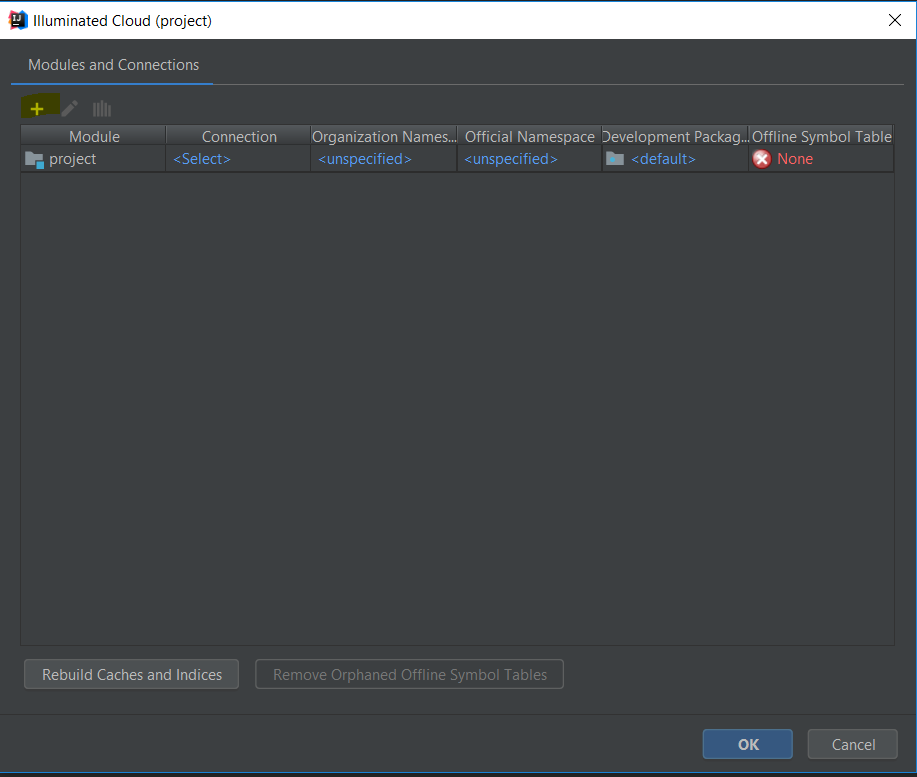
Fill the form with your credentials and click on ‘OK’.

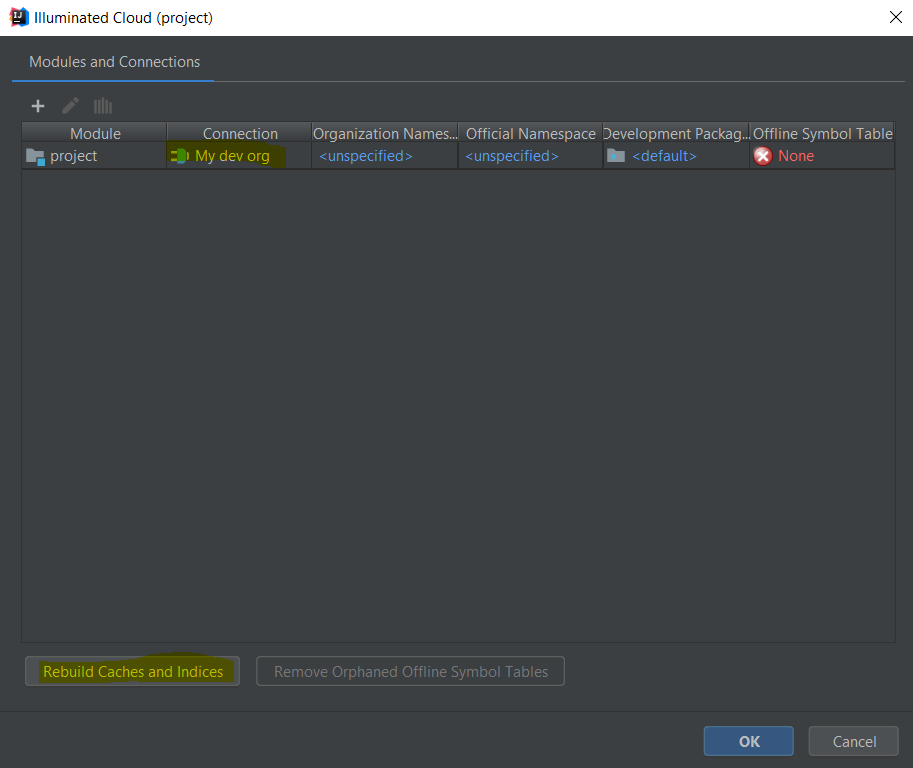
Fill the connection field whith the one we have created (in this example ‘my dev org’) and click on ‘Rebuild Cache and Indices’.
Click on ‘OK’.

Click on ‘OK’

Click on ‘Convert’.

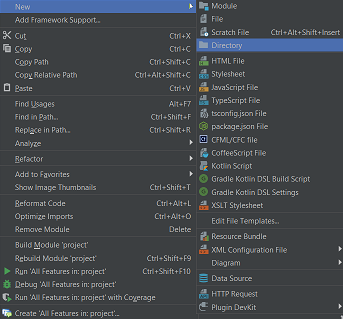
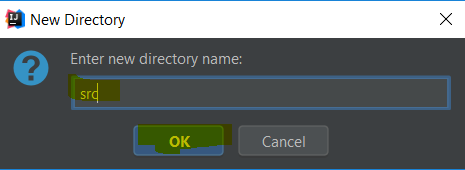
Create a folder called ‘src‘ which will store the metadata. Click on right button in the mouse in your folder -> New -> Directory

Name it ‘src‘ and click on ‘OK’.
Synchronise this folder with your org. On the ‘src’ folder, click on right button -> Select ‘Illuminated Cloud’ -> Retrieve Metadata.


Select the connection that you created before on the Connection field (‘my dev org’), ‘Module ‘project’ and dependencies’ on the Contents field and click on the pencil.

Point to the content root. Click on ‘Project Structure’ tab, select your ‘src’ folder and click on ‘Source’
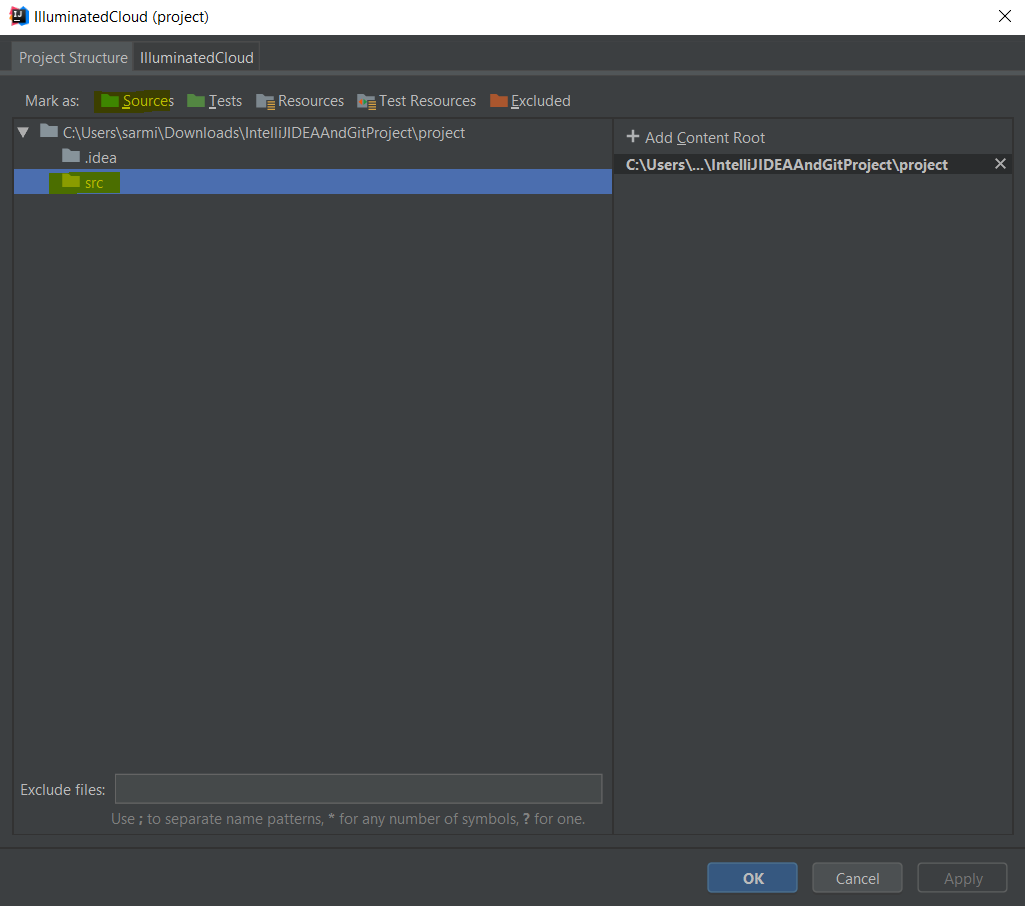
Verify that ‘src’ folder change to blue colour and it is added this message on the right side.

Select ‘Illumited Cloud’ tab -> ‘Selected’ subcription field -> Click on refresh icon.
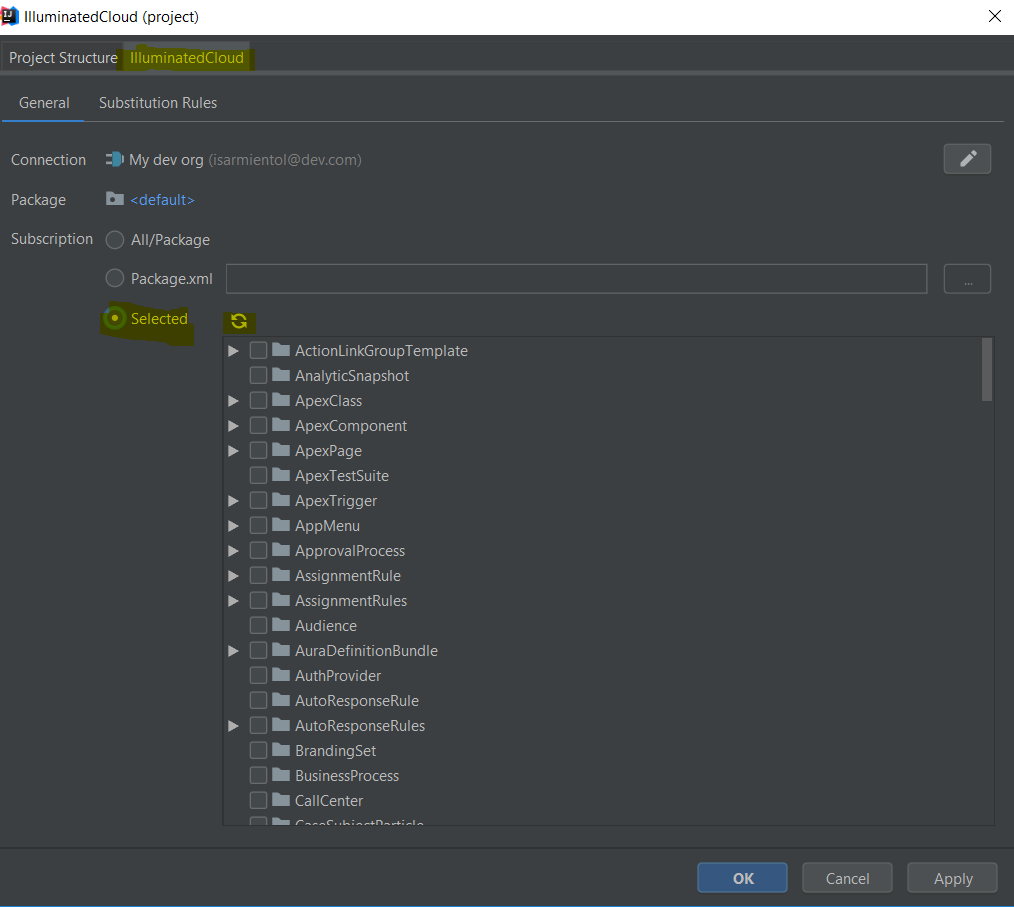
Select the metadata you want to retrieve. In this example, we select one apex class called ‘AApexCodeExample’
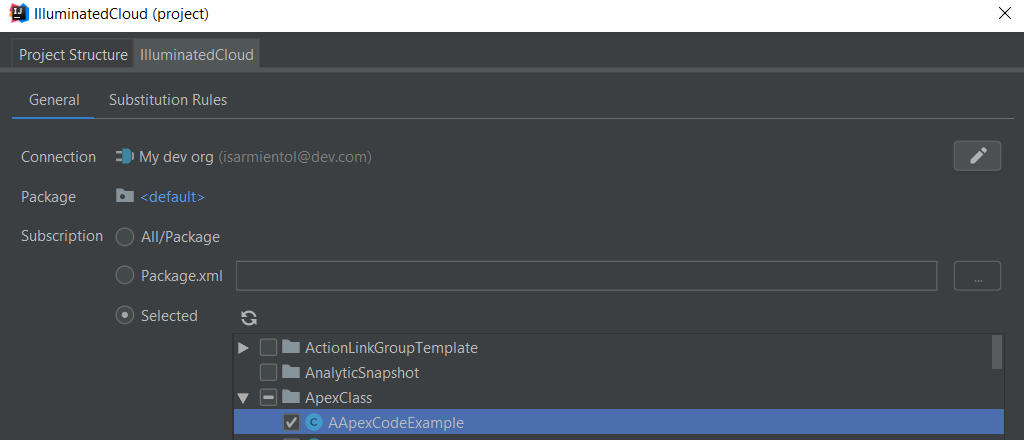
Click on ‘Save and then ‘OK’

Review you metadata is added on the list and click on ‘Retrieve’

On the right, should appear the apex class and package.xml in the ‘src’ folder.

Step 4. Commit and push to your repository
Select ‘Version control’ tab (on the bottom).
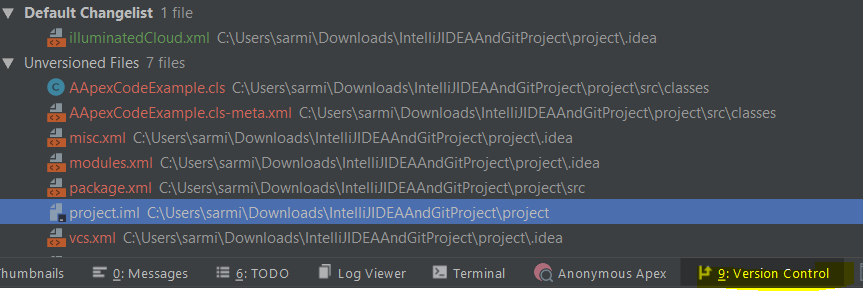
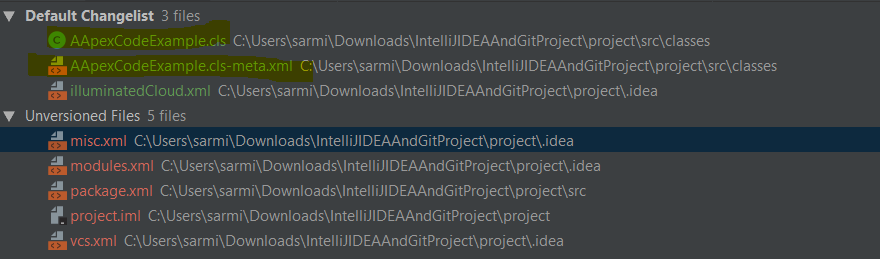
Move from ‘Unversioned Files’ to ‘Default Changelist’ the changes we want to commit. We have added our retrieved apex class.
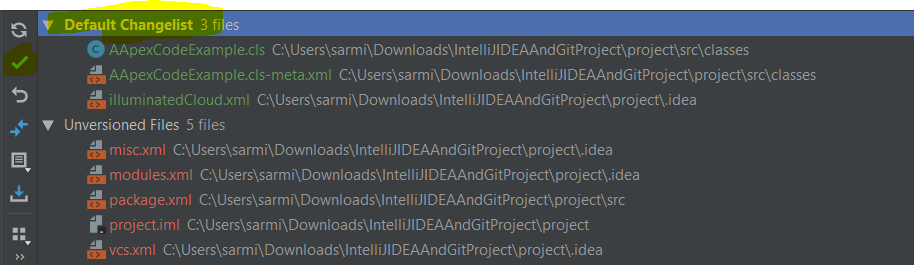
Select ‘Default changelist’ and click on commit button.
Verify these are our commit changes and write the commit message, for example ‘my first commit’.
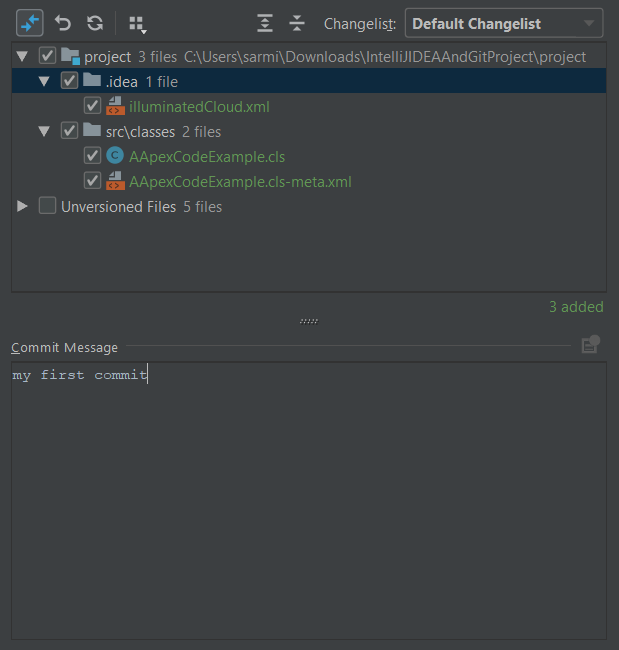
Commit and push the changes. Click on ‘Commit and Push…’
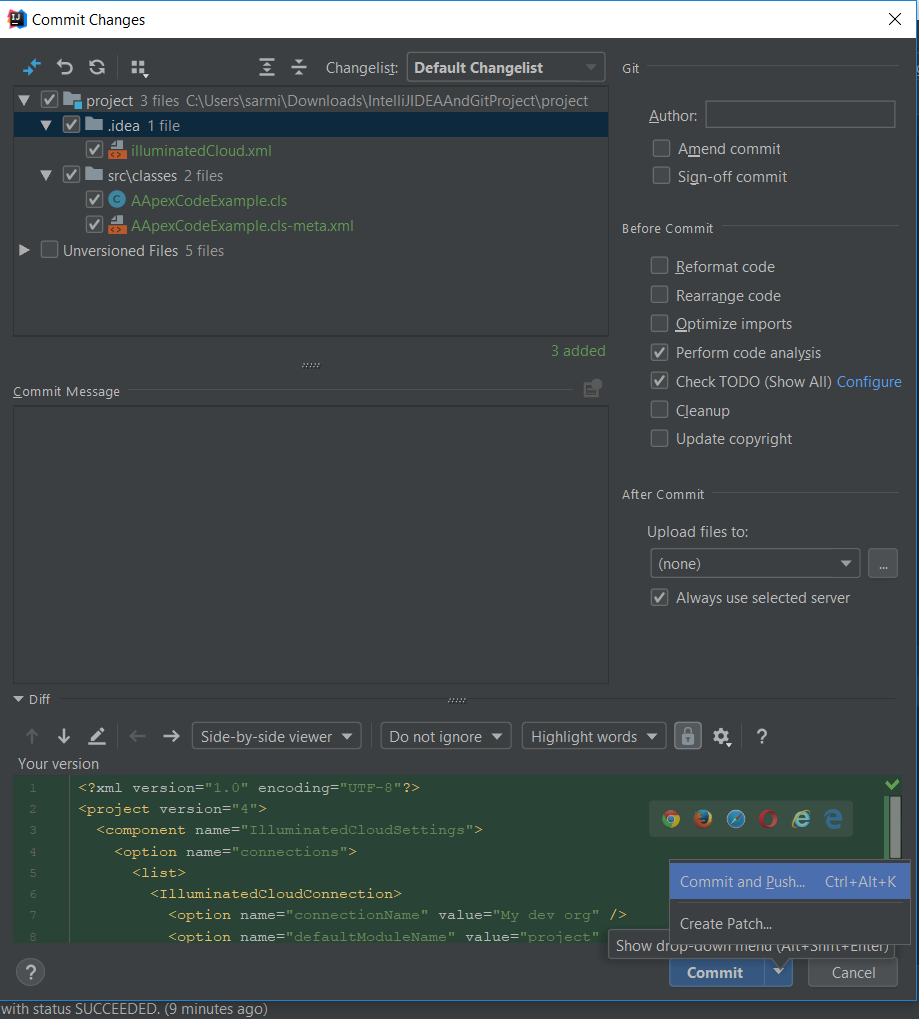
Click on ‘Commit and Push’.

Click on ‘Push’.
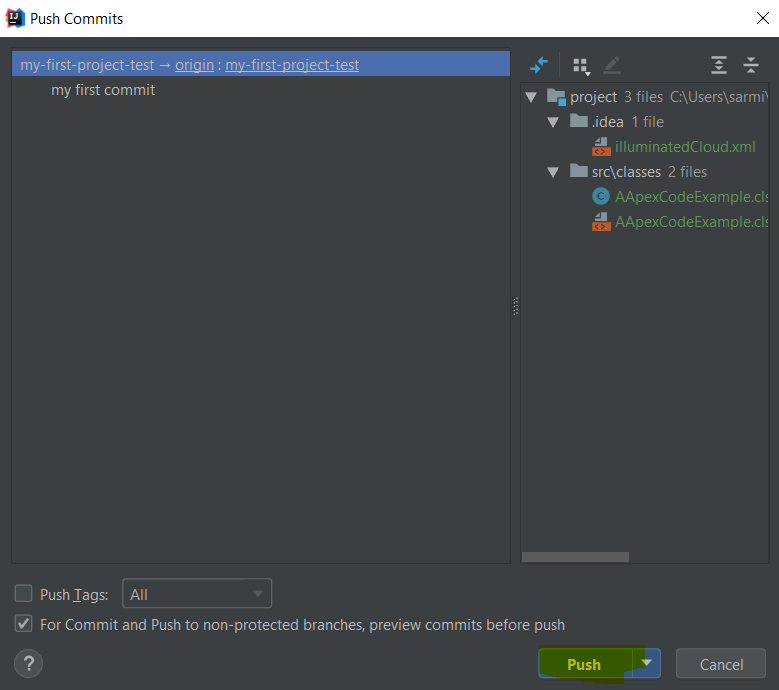
Go to GitHub to verify that our changes were pushed.


Also, you can try JetForcer. It also can be used for Salesforce development with Git and Intellij IDEA.
You can read more at their blog https://blog.jetforcer.com/salesforce-and-git/
LikeLiked by 1 person
Thanks for sharing!
LikeLike
Great post! But if you can also show how to add gitignore file and what all needs to be included that will be great! Looking forward
LikeLike
Hi Harsha,
Thanks for your question. The “.gitignore” file should be created automatically in the repo folder but it could be hidden. Just make all hidden files visible with Windows settings.
I have attached the values which I usually add on the “.gitignore” file
.classpath
.DS_Store
.sfdx
.project
.salesforce
.vscode
.idea
.tern-project
.settings
IlluminatedCloud/
Good luck in your learning adventure! 🙂
Thanks
Regards,
Ignacio
LikeLike
Helpful post, thanks for sharing!
LikeLike
Thanks companallc5!
LikeLike